
An essential part of the ignition system in your car is the ignition coil. It transforms the vehicle’s battery’s low voltage into the high voltage required to ignite the spark plugs. Your car can start and run when the fuel-air mixture in the engine is ignited by this spark. A malfunctioning ignition coil can cause a number of problems, such as engine misfires, low fuel efficiency, and trouble starting the car.
Indications of a Bad Ignition Coil
Maintaining the performance of your car depends on being aware of the warning indications of a failed ignition coil. The check engine light coming on, engine misfires, rough idling, low power, and inefficient fuel use are typical symptoms. It’s critical to identify the problem and take immediate action if you observe any of these symptoms. Auto Repair Services in Lynden, WA may offer skilled diagnostics and repairs to people in need of experienced assistance.
Getting the Parts and Tools You Need
Make sure you have all the tools and parts needed before beginning the replacement procedure. A new ignition coil, screwdrivers, a socket wrench set, and potentially a torque wrench are required. To aid you through the process, it’s also beneficial to have a service handbook tailored to the model of your car.
Safety Measures
When doing repairs on your car, safety should always come first. To prevent burns, make sure the engine is cool before doing any work. In order to avoid any electrical shocks or unintentional short circuits, disconnect the negative battery terminal. For the duration of the procedure, put on safety gloves and goggles.
Where the Ignition Coil Is
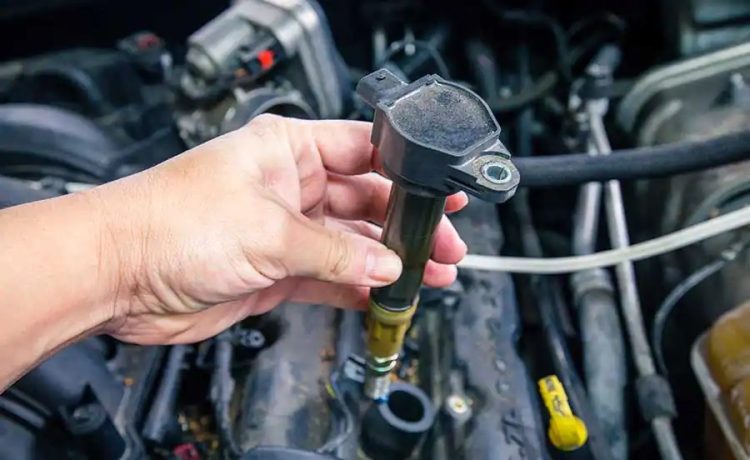
Usually found next to the spark plugs on top of the engine is the ignition coil. There can be a single coil for each cylinder or a single coil pack for all the cylinders, depending on the make and type of your car. To identify your vehicle’s ignition coil precisely, refer to the service manual.
Eliminating the Defective Ignition Coil
Disconnect the electrical connector that is connected to the malfunctioning ignition coil before attempting to remove it. Next, unscrew any bolts or screws holding the coil in place with your socket wrench. Lift the ignition coil out of its place with caution. Use caution so as not to harm any nearby components.
The New Ignition Coil Installation
Put your replacement ignition coil in the same spot as the old one. Use the bolts or screws you took out earlier to secure it. To guarantee a strong connection, make sure the coil is firmly in position. Reattach the replacement ignition coil’s electrical connector.
Verifying Your Work Again
Verify your work twice before putting everything back together. Make that the electrical connector is connected correctly and that the ignition coil is firmly secured. In order to prevent problems after you start the engine, this step is essential.
Reattaching the Battery
Reconnect the negative battery terminal once everything has been placed correctly. By doing this, you’ll be able to test the new ignition coil and get the car running again. Turn on the engine and keep an ear out for any indications of erratic idling or misfires.
New Ignition Coil Testing
Watch how the engine performs while it is running. An engine that runs smoothly and has no warning lights on is a successful replacement. Should problems continue, it might be essential to obtain additional diagnostic testing or consult a specialist?
Conclusion
You can guarantee dependable operation and improve your car’s performance by replacing a malfunctioning ignition coil. You can safely replace the ignition coil and resume driving with a smoothly operating engine by following these instructions.


