
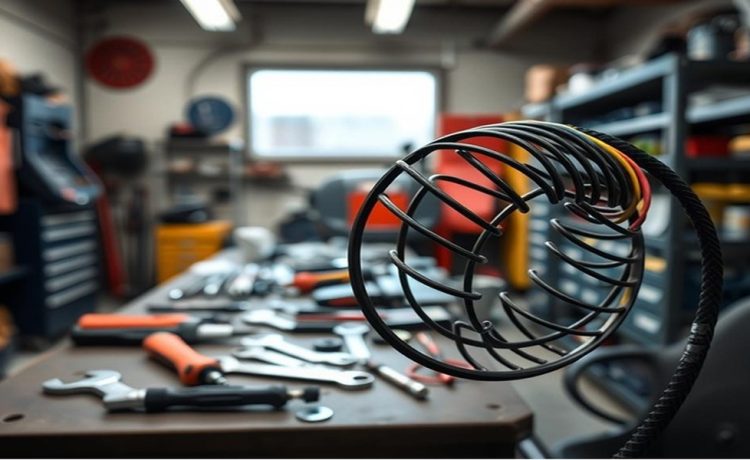
A clock spring spiral cable is inside the steering column. It keeps electrical circuits connected as the wheel turns. When it wears out, signals can drop out, mainly during tight turns and parking. Replacing it is not just for comfort; it’s a safety fix that needs care and patience.
If you see an airbag warning light, it’s more than a dashboard issue. A failing clock spring can cut off the airbag circuit. This is a serious safety concern. It can also cause steering wheel controls and the horn to malfunction.
This guide will help you replace the spiral cable safely and correctly. It’s designed to fit your car model and follow your service manual. For drivers in Australia, make sure to follow the maker’s instructions and local safety rules before working on the airbag system. Replacing the clock spring usually takes about 1 hour. But rushing can damage parts and lead to more problems.
Key Takeaways
- A clock spring spiral cable maintains electrical connections as the steering wheel rotates.
- Car clock spring replacement often becomes necessary when the airbag warning light on stays lit.
- Common symptoms include steering wheel controls not working, the horn not working, and cruise control faults.
- Airbag clock spring safety depends on strict handling and service manual steps.
- Plan for about 1 hour, plus extra time for careful checks after spiral cable replacement.
- A steering wheel clock spring repair should be precise to prevent repeat failures and warning lights.
What a Clock Spring Does and Why It Matters for Safety Systems
Drivers often ask, what is a clock spring spiral cable, and the answer is simpler than it sounds. It’s a coiled, ribbon-like electrical connector inside the steering wheel area. It keeps circuits working while the wheel turns.
The clock spring function is to protect a steady steering column electrical connection. It does this through thousands of left and right turns. Without it, wires would twist, fatigue, and break far sooner.
The clock spring spiral cable’s purpose is to carry signals for the airbag, horn, and wheel-mounted controls. It does this without slack or tangles. When the internal ribbon wears or cracks, you can get airbag signal interruption that comes and goes as you steer.
That steering-linked pattern matters because it can mimic “random” faults. A warning light may show up when turning into a car park, then vanish on a straight road.
If the horn circuit steering wheel path opens, the horn may stop working at the worst time. This can happen in dense traffic. Steering wheel buttons failure can also show up as dead audio, cruise, or hands-free controls, even though the rest of the car seems fine.
Some vehicles use a canceling design, while others are non-canceling. This changes how the turn signal behaves after a corner. Either way, the goal is the same: keep signals consistent as the wheel rotates.
|
System |
How the clock spring supports it |
What drivers may notice when it starts failing |
|
Airbag |
Maintains the steering column electrical connection between the airbag module and the control unit |
Warning light, intermittent airbag signal interruption when turning, or stored fault codes |
|
Horn |
Completes the horn circuit steering wheel contact while allowing full wheel rotation |
Horn works only at certain angles, delayed response, or no horn at all |
|
Steering wheel controls |
The routes button signals through the clock spring spiral cable, a purpose-built ribbon path |
Steering wheel buttons failure like dead cruise, audio skips, or hands-free dropouts |
|
Turn-signal cancel feature (when equipped) |
Works with a canceling or non-canceling setup tied to steering rotation |
The turn signal doesn’t cancel after a bend, or it cancels too early |
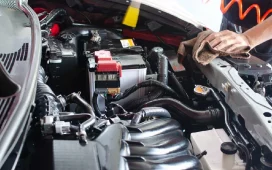
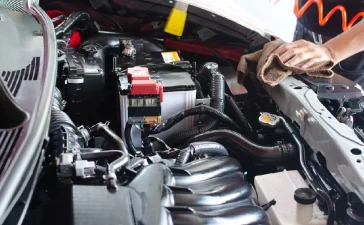
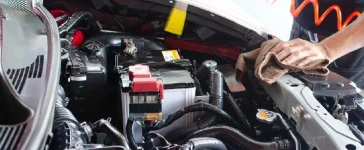
Tools, Parts, and Setup Checklist for a Clock Spring Replacement
Before starting, make sure the car is on a level surface. Apply the parking brake and use wheel chocks on the tires. Turn off the engine and remove the key to avoid surprises.
Wear PPE gloves and eye protection if needed. Disconnect the negative battery terminal for airbag safety. Wait 10-15 minutes before touching any yellow connectors or SRS components.
Have your tools ready and clear the area around the steering column. Use a Phillips screwdriver and a flat-blade screwdriver for most screws. A Torx driver is needed for column shrouds and airbag fasteners.
If the steering wheel is hard to remove, use a steering wheel puller. This tool helps avoid damaging the shaft. Use a torque wrench to tighten the steering wheel bolt correctly.
https://www.youtube.com/watch?v=_Evxqwhh2zM
Choose the right clock spring kit for your car. Make sure the connector shapes match before starting. Some kits have different screws; keep only the correct ones to avoid confusion.
|
Item |
Where it’s used |
What to check before you start |
|
wheel chocks |
At the front or rear tires to stop the vehicle movement |
Correct size, placed tight to the tread, stable on the surface |
|
PPE gloves |
Hands and wrists around trim edges and column brackets |
Snug fit for grip, no tears, clean fingertips for connector work |
|
Torx driver |
Column covers, airbag/steering wheel fasteners on many models |
Correct bit sizes ready, tips not rounded, handle clears tight spaces |
|
Phillips screwdriver |
Lower dash and shroud screws, small interior fasteners |
Proper #2/#3 fit, no cam-out, magnetized tip helps control |
|
flat blade screwdriver |
Gentle clip release and light prying at trim seams |
Blade edges are smooth to avoid marring, used with controlled pressure |
|
steering wheel puller |
Separating the wheel from the steering shaft splines |
Correct bolt thread and length, arms sit square, no bent hardware |
|
torque wrench steering wheel bolt |
Final tightening of the steering wheel fastener |
Working torque range matches spec, recently calibrated, smooth ratchet |
|
clock spring kit |
Replacement spiral cable and included mounting hardware |
Centering lock intact, connectors match, correct screw type selected |
Take clear photos before unplugging anything. Label connectors as you remove them. Keep screws organized by location for easy reassembly.
Step-by-Step: How to Replace a Clock Spring Spiral Cable Without Damaging the Airbag System
Start with the wheels pointed straight ahead and the key out of the ignition. Disconnect the negative battery terminal, then wait 10-15 minutes to avoid airbag deployment while you work around the steering wheel wiring.
To remove the steering wheel airbag module, follow the release method used on your wheel: some designs unlatch from rear access holes, while others pop free through front apertures. Pull the module forward only far enough to unplug the connectors, keeping strain off the pins and short harness.
Before the steering wheel comes off, make a clear steering wheel alignment mark across the wheel and shaft. Remove the center fastener with the correct socket, and use a wheel puller if the wheel is tight on the splines, so you don’t shock the column.
Next comes steering column cover removal. Take out the screws, separate the upper and lower shrouds, and don’t force the trim if a small harness limits movement; many columns don’t need full cover removal to reach the clock spring housing.
With the clock spring exposed, do the clock spring connector release at the lower plug by lifting the locking tab gently, then disconnect it cleanly. Remove the retaining screws and lift the old unit straight out, keeping the steering centered and the wiring untwisted.
|
Step |
What you do |
What to watch for |
|
Power-down |
Battery negative off, wait 10-15 minutes |
Helps avoid airbag deployment from stored energy |
|
Airbag handling |
Unlatch and unplug the module carefully |
Don’t pull on wires; protect connector pins |
|
Wheel indexing |
Add a steering wheel alignment mark before removal |
Keeps the wheel straight on reassembly |
|
Spiral cable swap |
Unplug, unfasten, and lift the clock spring out |
Don’t rotate the column; don’t kink the harness |
|
Install and seat |
Center the new unit, align holes, reconnect until it clicks |
Do not use if the shipping lock/label shows it was disturbed |
Install the replacement by centering it first, then align the mounting holes (they typically fit one way). Tighten the clock spring screws to 15-35 in-lbs, route the harness through the wheel opening, and reconnect the lower plug until you hear a click.
Reassemble in reverse: shrouds on, wheel back to your mark, and the module reconnected and secured.
Alignment, Centering, and Torque Specs to Avoid Premature Clock Spring Failure
Most early failures happen when the ribbon inside the housing gets wound too far. That is why clock spring centering matters as much as the replacement part itself. If the unit is off by even a turn, normal cornering can pull it tight and tear it.
Keep the steering wheel straight ahead during the moments that set position-before the wheel comes off and while it goes back on. This keeps the column clocked the same way it was driven, so the wheel spokes and the airbag harness sit where they should.
Most new assemblies show spiral cable alignment marks through a window or on the cover. Match those marks before the part is seated, and avoid forcing the locator tabs. If the cover has a shipping lock, leave it in place until the wheel is ready to install.
Torque is the other common problem. Over-tightening can distort plastic, while under-tightening can let the unit shift on the column. Using the service manual is best, as torque specs for steering wheel nuts vary between cars and heavy vehicles in Australia.
|
Fastener point |
Range seen in service procedures |
Why it matters for fit and lifespan |
|
Clock spring mounting screws |
15-35 in-lbs |
Correct inch-pound torque screws help the housing sit flat without cracking bosses or letting the module walk. |
|
Center column screw |
20-40 in-lbs |
Supports column trim and routing so wiring stays clear of moving parts and rub points. |
|
Post screws (column cover install) |
10-25 in-lbs |
Prevents loose covers that can pinch leads or tug on connectors over time. |
|
Steering wheel fastener |
660-720 in-lbs (example heavy-vehicle kit) or 37 ft-lbs (50 Nm) in a documented passenger-vehicle procedure |
Following torque specs, steering wheel nut guidance reduces spline wear, noise, and wheel movement that can stress the ribbon cable. |
Before final tightening, confirm the harness passes cleanly through the wheel opening and the clip sits in its slot. Small checks like these help prevent clock spring damage caused by pinched wires, shifted connectors, or a wheel that returns off-center after a short drive.
Post-Installation Testing and Troubleshooting Before Returning the Vehicle to the Road
First, finish reassembling everything. Then, turn on the power for the clock spring test. Connect the battery and turn the ignition on without starting the engine. Watch the airbag warning light; it should go off in a few seconds.
If it doesn’t, it’s a safety issue. You must fix it before driving on Australian roads.
Next, check the steering wheel controls. Make sure all buttons work, like audio and phone. Also, check cruise control if your car has it.
Do a horn test to see if it sounds right. Then, turn the steering wheel all the way left and right. Look for any drag, rubbing, or clicks that might mean a problem.
Do a turn signal test before driving. Turn on the signal, make a slow turn, and check if it cancels correctly. If the horn or signals don’t work, check the spiral cable. Make sure each connector is seated correctly, and the clock spring is in the right place.
Only drive the car when everything works right, and the dashboard is clear.


